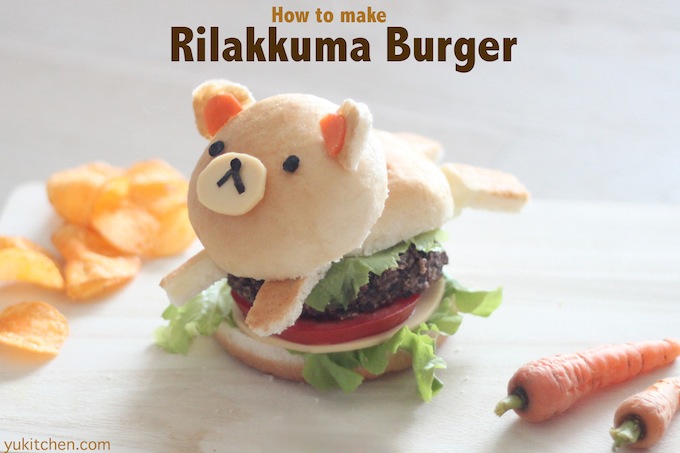
For the past couple of years, I’ve been on a quest for making the perfect veggie burgers. It’s been a quite mission to create the burgers that have everything that we need. But I think I’m finally comfortable enough to announce to the world that I’ve reached my goal today. My veggie burgers have finally hit my high standard, and I’m super excited to share this with you.
In this one, I’m showing you how to make the veggie burgers with a Rilakkua, for the sake of Yukitchen.com. But if you are keen on seeing the original veggie burger recipe that I created before, please look at this link!
Why did I make it with a Rilakkuma this time? *giggles* Well, why not? If it wasn’t a cute brown bear riding your burger, I don’t think anyone will notice how delicious a veggie burger can be. I hope you like it!
- (Read How to make Yuki's veggie meat for more information!)
- ・1 cup black beans (Soak overnight, then boil for a couple hours next day)
- ・1/4 cup black rice
- ・1/3 cup brown rice
- ・1/3 cup quinoa
- ・1 cup water (for making rice)
- ・1/2 cup oats
- ・1 onion (chopped)
- ・1 cup mushrooms (chopped)
- ・3~4 garlic clove (chopped)
- ・3 tbsp soy sauce
- ・a pinch of salt
- ・1 tbsp black pepper
- ・3 tbsp cumin powder
- ・1 tbsp coriander powder
- ・1 tbsp cayenne pepper
- ・1/2 regular burger bun (per bear)
- ・1 mini buns (per bear)
- ・3~4 pieces lettuce
- ・1 tomato
- ・1~2 slice your favorite cheese (optional)
- ・1~2 pieces nori (dried seaweed)
- ・1~2 slice carrot (just a little bit)
1: Soak the black beans overnight.
Then boil them for 1~2 hours the next day.
2: Cook black rice, brown rice, and quinoa.
1 cup of water should be enough.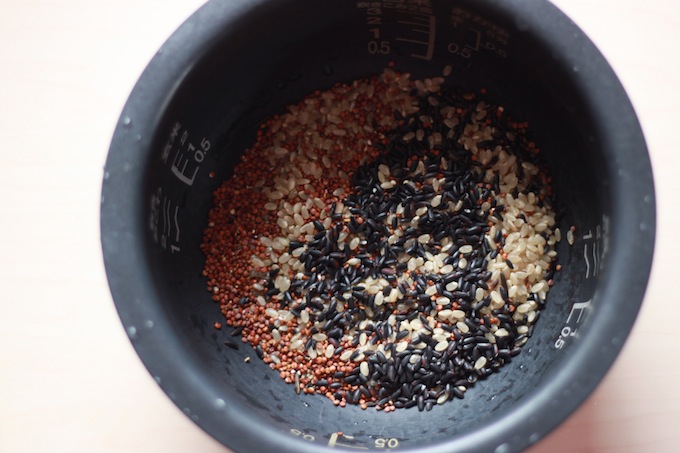
3: Mash the beans after the boil.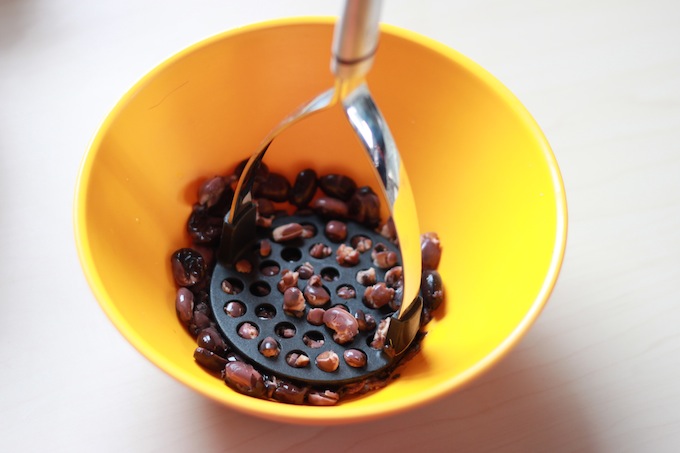
4: Chop onion, garlic, and mushrooms and mix with the black beans.
5: When rice is done, start flavoring.
Mix the cooked rice with the rest of the ingredients. Then add the soy sauce, maple syrup, salt & pepper, cumin, coriander, and cayenne pepper in the bowl and mix well.
Use your hands to mix the mixture. If your veggie meat is too wet and doesn’t seem to stick together, you can add oats little by little to fix the situation. 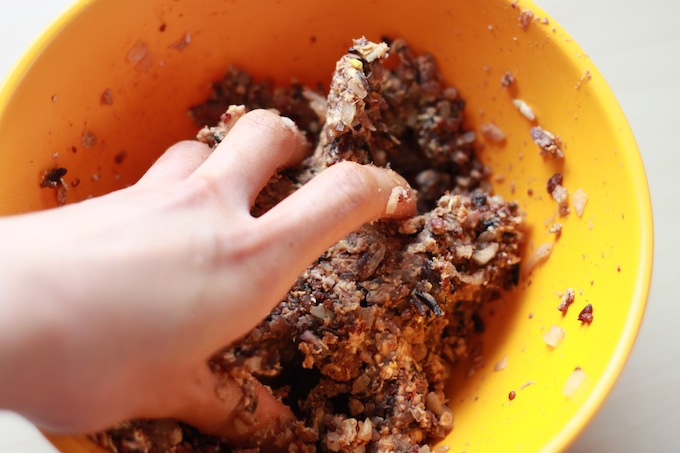
6: Make shapes.
This is the shape for the veggie burger. You can wrap the rest in the fridge and should be fine for the next 5~6 days. 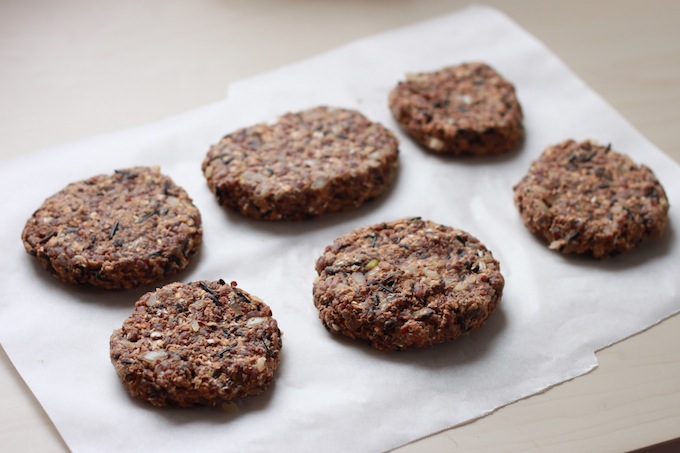
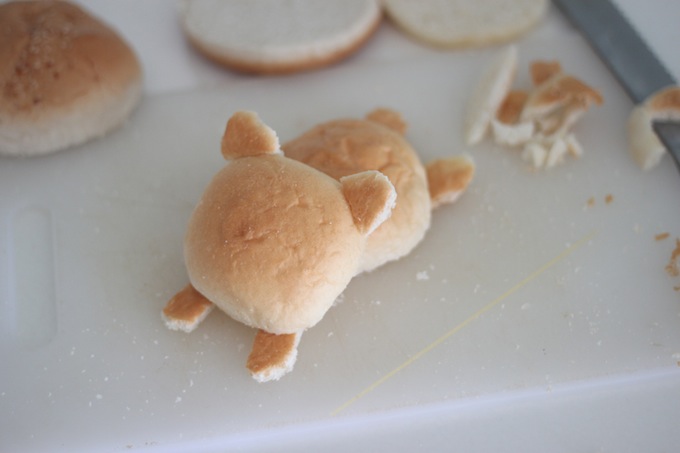
7: Burger bun time!
Regular buns are for the top part of the burger. Mini buns are for the bottom. 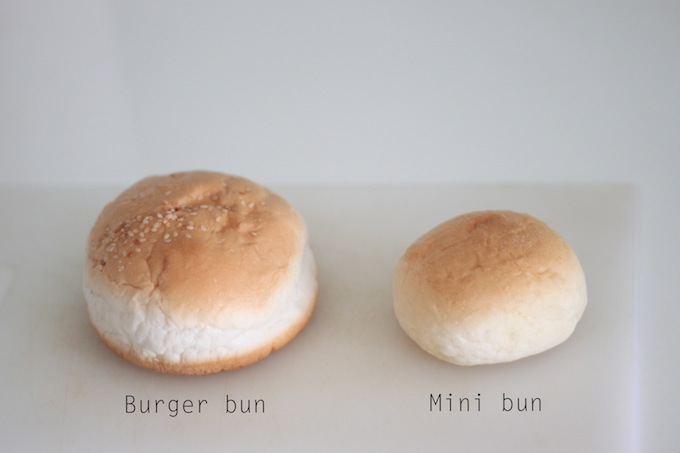 8: Make the body parts.
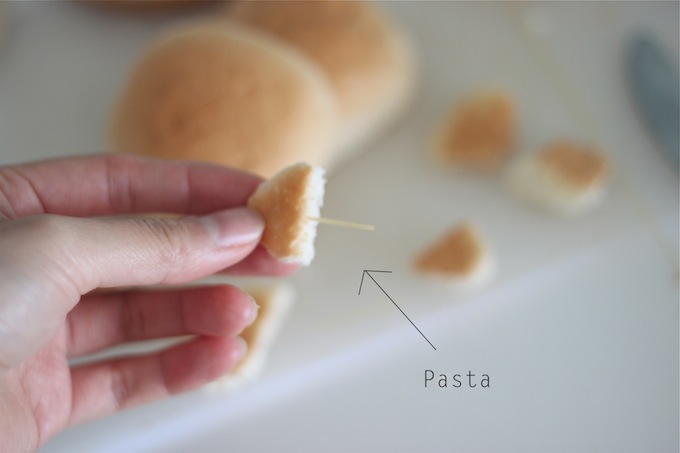
Use the bread knife to cut the buns in half. For the limbs, I used a table knife to cut off the small details.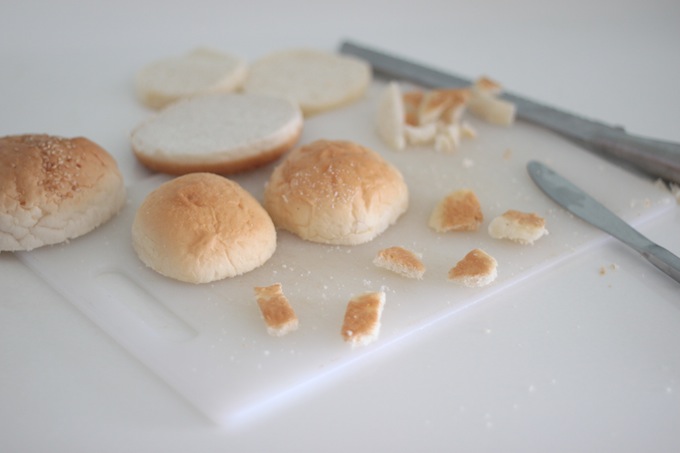 9: Use pasta as glue.
 10: Make the facial parts.
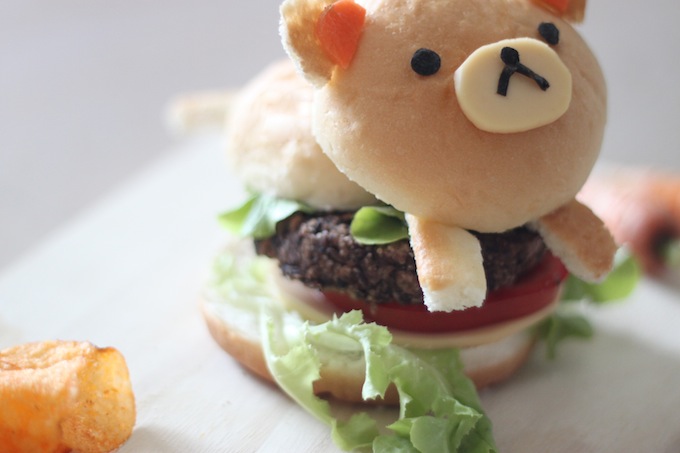
Cut a slice of cheese for Rilakkuma’s month. I used a pair of cooking scissors but if you have a cookie cutter that shapes like his month, that would be perfect!
For his eyes and nose, I used nori punchers to cut out the nori (seaweed). If you don’t have the puncher, just use the scissors again. 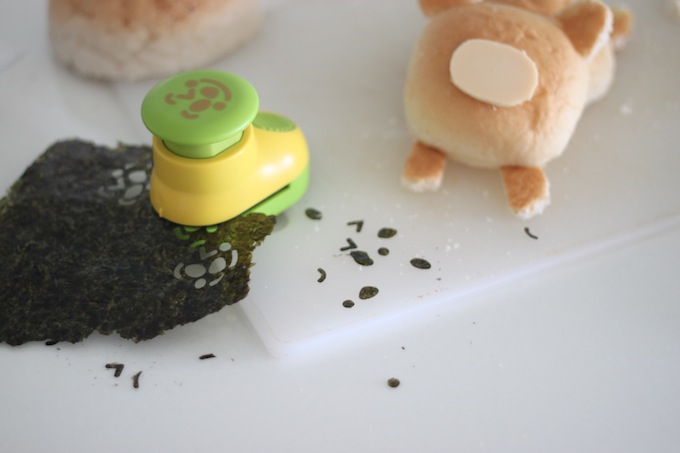 11: Use rice as glue.
This is my grandma’s trick. Cooked rice is sticky, and Japanese people back then used it like glue. Pick up a piece of rice and smash it on top of each nori, and carefully place it on a burger bun to make the Rilakkuma’s face. 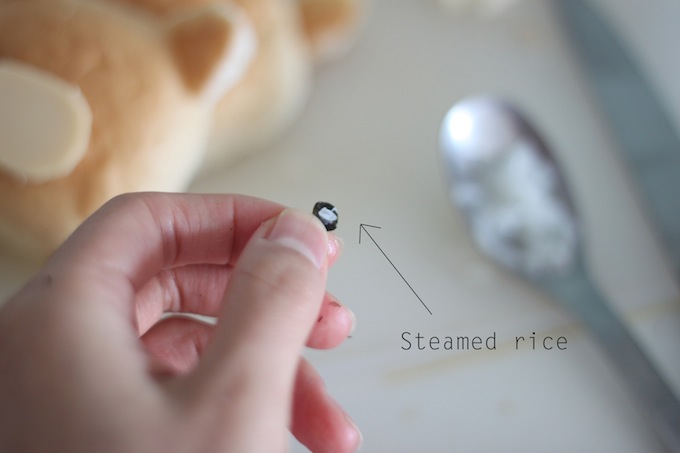 12: Cut carrot for his ears.
Cut a slice of carrot as thin as possible and place them on each ear. And there you go, a Rilakkuma Burger bun! 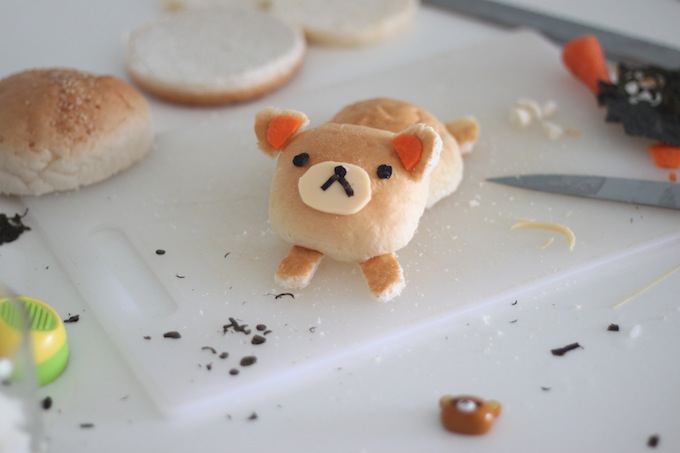 13: Grill the veggie meat.
Grill it with medium-high heat. Wait till it turns a little bit brown and crunchy outside. 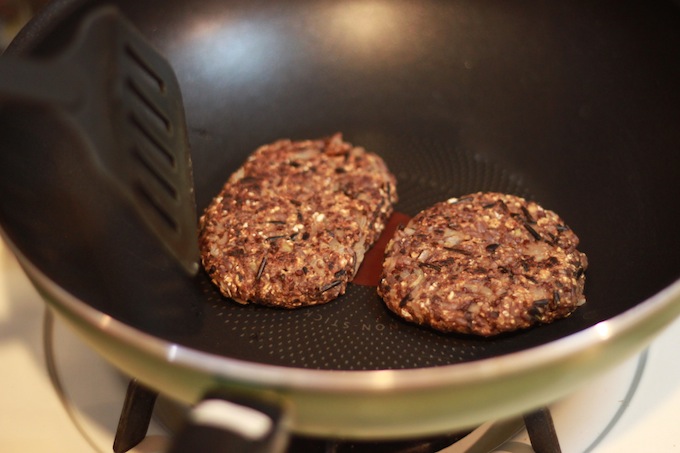 This veggie meat is great for veggie burgers, but also fantastic for burritos, wraps, and food pies! I tried making Gyoza dumplings the other day, adding some garlic and Japanese “nira” leaves, and it was so good. I highly recommend re-using the veggie meat for different recipes.
14: Cut the veggies.
Cut tomatoes, lettuce, and cheese in the preferred size, and start layering them on top of the bottom bun. I recommend flavoring it with some salt and peppers, or even your favorite BBQ sauce. 15: Let him ride it!
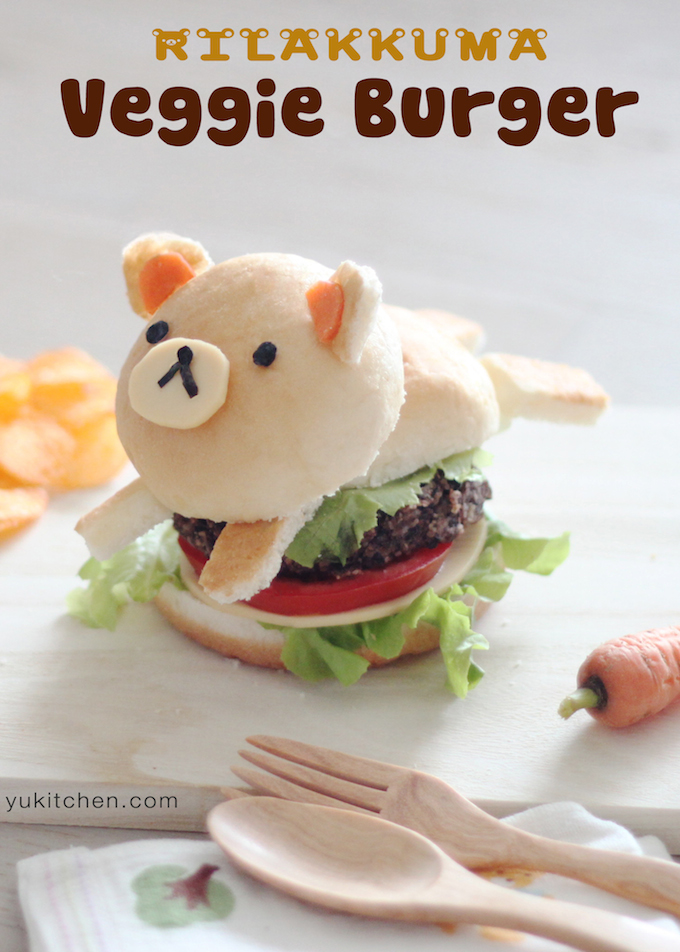
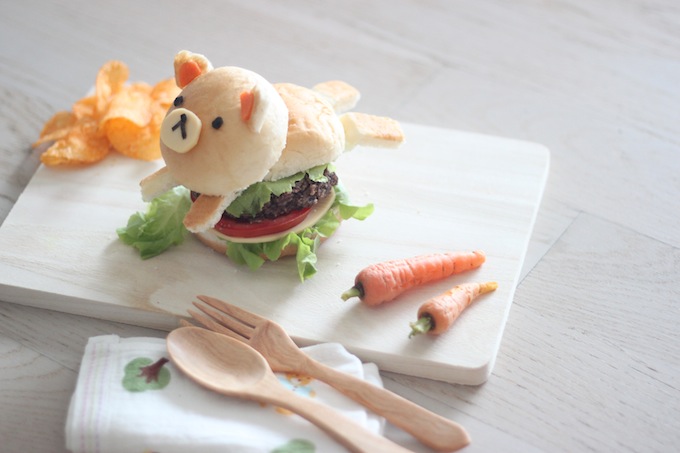
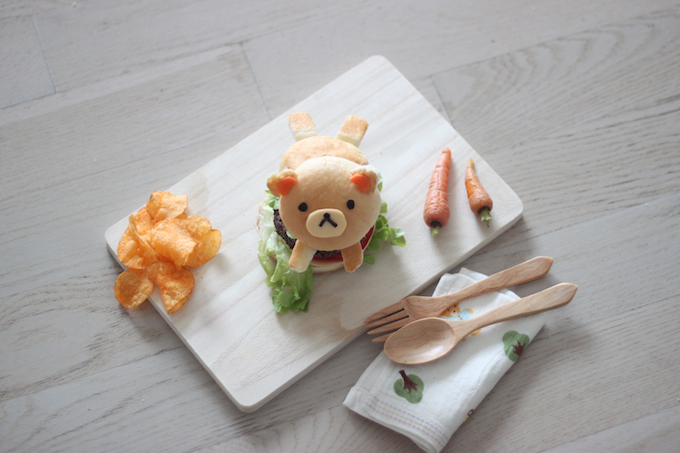
After adding all the layers, it’s time for Rilakkuma to ride the burger. 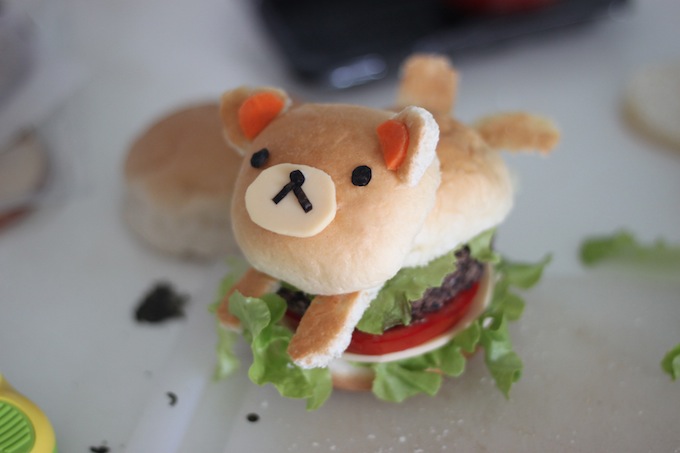 Your hard work has finally paid off! This Rilakkuma burger is seriously the cutest burger, ever! I added my favorite potato chips and steamed baby carrot with it 😉
 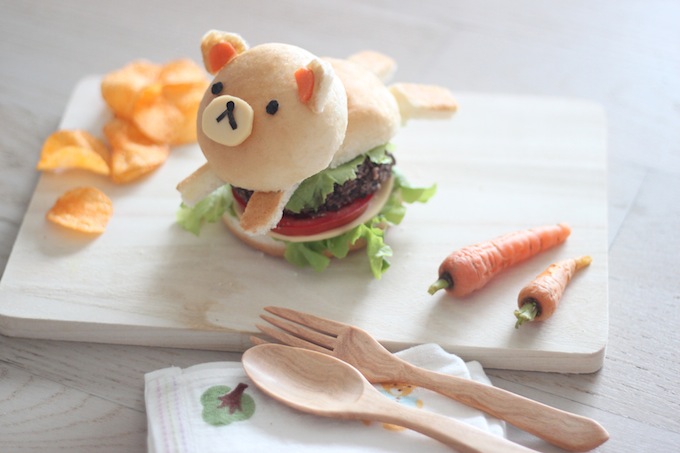 Have you ever had your burger, looking at you? This is a very awkward feeling when your burgers looking into you, don’t you think? *giggles*
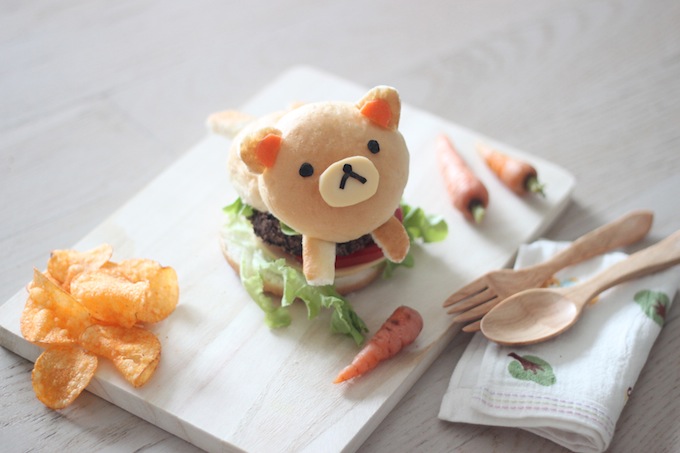
This is a Rilakkuma burger, veggie version. But I know that some of you came from Forks Over Knives website, and I’m super happy to have you here. But please know that I’m not trying to reduce the number of meat-eaters; I’m trying to increase the number of veggie lovers. I’m only trying to find someone like me in this digital world, and “Rilakkuma Burger” is a very good bait for you to find me.
Lastly, thank you so, so much. I am not a chef, nor a food expert. I just love food! But still, someone like you comes to my website and reads until the end of this tipsy recipe…. -it means the world. Thanks.
The pig-shaped bun is just adorable!!!
Thanks Claudia! It’s actually a bear 😛
ゆきさん、はじめまして、志保子といいます。Food gawker でスーパーかわいい 写真をみつけたので、日本人かなと思って、ブログよませていただきました。 可愛いですね。がんばれ〜。
志保子さん!日本語のコメント初でうれし過ぎます♥️ こんにちは!素敵なコメントどうもありがとうございます!これからもがんばりますね☆
ゆきさん、質問があります。私もブログやってるんですが、日本語・英語きりかえ、どんなプラグインをつかってるんですか?それから、Pin It のピン、右下のコーナーに出てくる動物すっごくかわいいですね。どうやってやってるんですか?教えてください。
質問回答です! 翻訳用に、qTranslate-Xのプラグイン使ってます。右下のピンの猫、私がデザインしたんです。ちなみに、飼い猫をモデルにしてます笑。それも、描いたイラストをpngにして、それをカスタマイズしてボタンのようにしました!
ゆきさん 回答どうもありがとうございます。イラストすっごく可愛いです。
ありがとうございます〜!♥️♥️
This was delicious. It remind of of a beef burger when I ate it!
Oh you tried?! Wow great! And yes I know. It’s crazy! 😀